I am getting super excited for my family's upcoming trip to Disney World, and as you can tell, I have been doing a lot of sewing already for the trip. This, however, is a very special project. It is a backpack that is meant to do-it-all at Disney (and the zoo and other tourist-type places). I have used a backpack in Disney before - particularly when I have to tote around diapers and other toddler items. This trip will be diaper-free, stroller-free, toddler-free. With my 10 and almost 12 year old big enough to carry waistpacks and their own water bottles, I do not need to carry stuff for them. In fact, they have double water bottle waistpacks so they have been pulled into big brother duty to help the 5 and 7 year olds. That worked pretty well at the zoo last week.
Image may be NSFW.
Clik here to view.
Image may be NSFW.
Clik here to view.I do, however, plan to carry a few things and this is where I started designing my bag. I needed it to hold a small wallet, a car key, sunscreen, lip gloss, a tiny first aid kit, my DSLR (a Nikon D3100), cell phone, extra batteries, a water bottle, a small amount of snacks, park maps, ponchos (the cheap kind that they sell for way too much in Disney, but are cheap in Target or Walmart), and possibly a small souvenir or two.
I needed it to have a few separate pockets, but also to be very water-resistant. I wanted soft, comfortable straps, and preferably ones I could adjust and convert to a cross-body type bag.
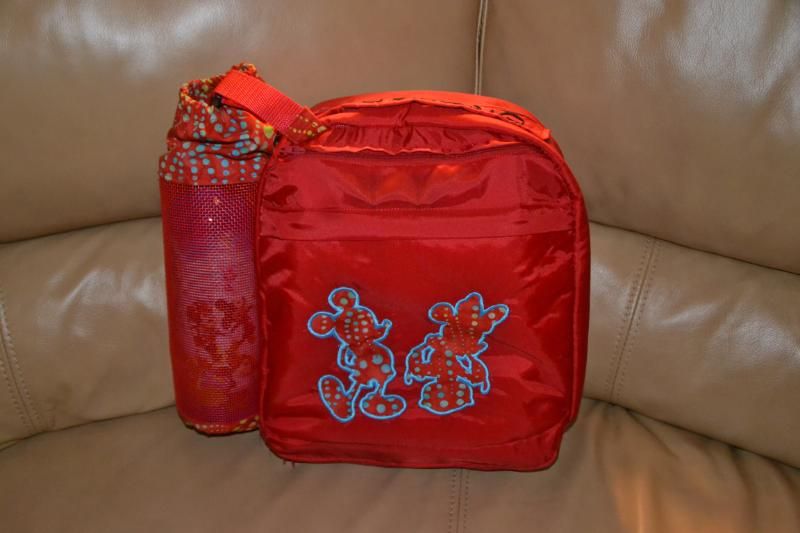
Here is what I came up with:
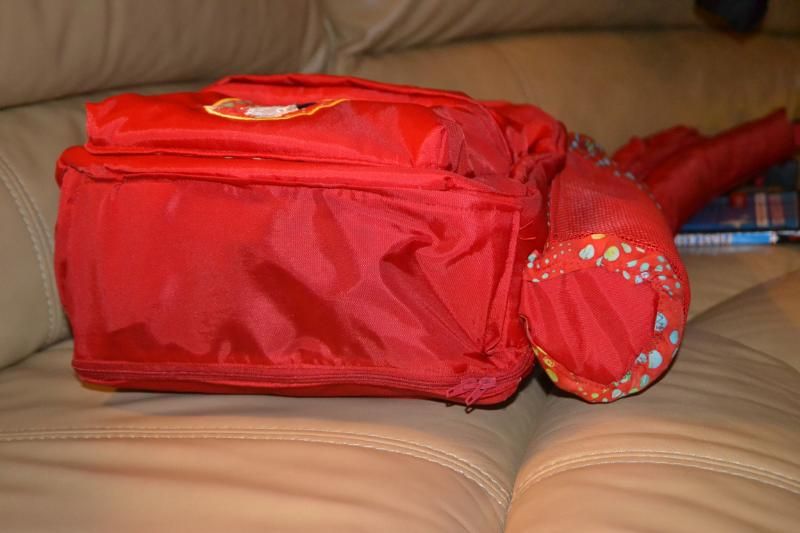
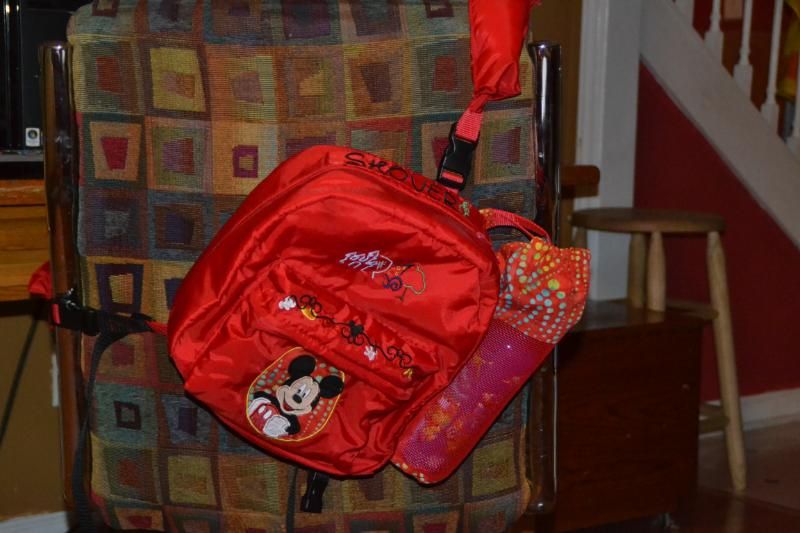
The outside is nylon rip-stop from Joann's in a pretty Mickey Mouse red. I drafted the basic back and front panels slightly larger than my backpack purse, but with a much wider gusset to accommodate the size of my camera. All of the lining is a red batik that I fused with a laminating material everywhere it needed protecting (the entire inside as well as pocket linings). I added a dimensional pocket on the front based on directions from a Taylor Made Designs backpack pattern/leaflet, but I changed the dimensions to match what I needed.
Image may be NSFW.
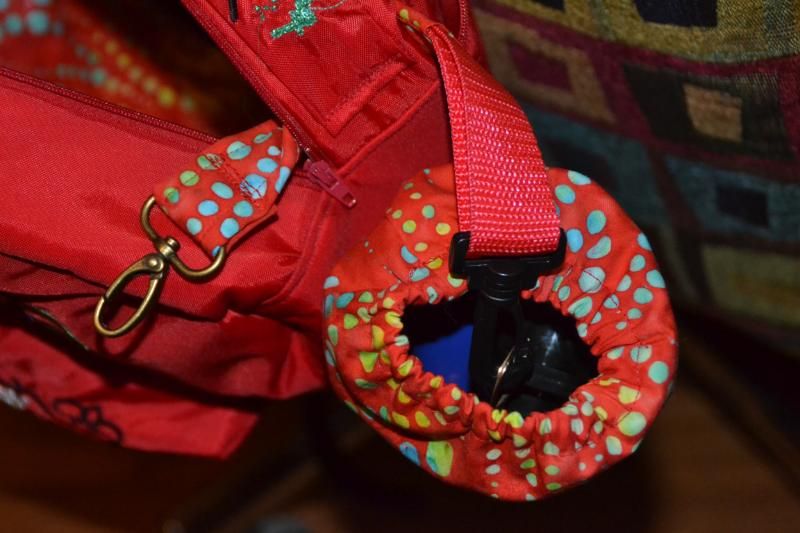
Clik here to view.I wanted the water bottle to be able to be easily accessible and not where it could leak on my camera. I toyed around with interior sections, but I decided instead to add a mainly mesh pouch to the side. As I was constructing it, I used a small leftover piece of red webbing to attach a plastic swivel hook. This way, the bottle cap is much less likely to get lost. (On a side note, how cute is this bottle? I got it on clearance at the Disney Store outlet in Concord, NC. It is a 25th anniversary edition and the last one they had.)
I also figured the strap would keep the bottle from falling out even though that is pretty unlikely. Inside the bag, the same strap is attached to a metal swivel hook that would be perfect for hanging my car key securely. We won't be using our car much while there (we are staying on-property at the new Art of Animation Resort!), but I plan to keep the key on that hook so I can easily find it when we do need it.
Image may be NSFW.
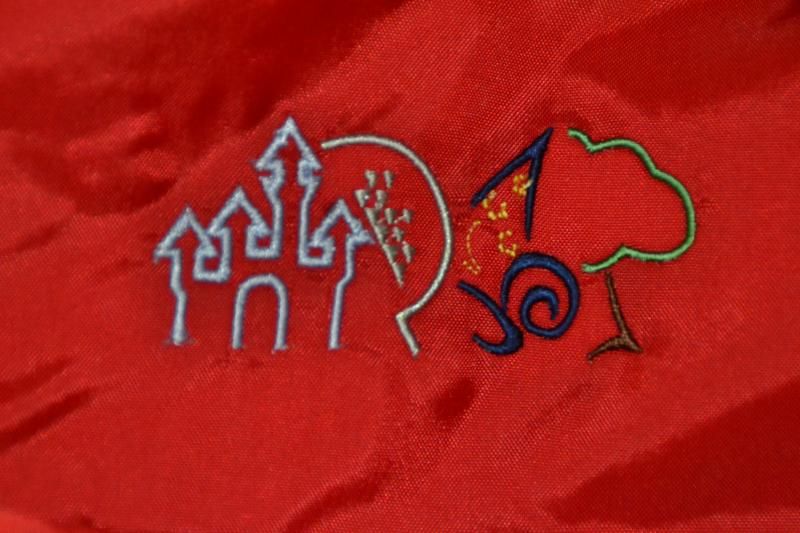
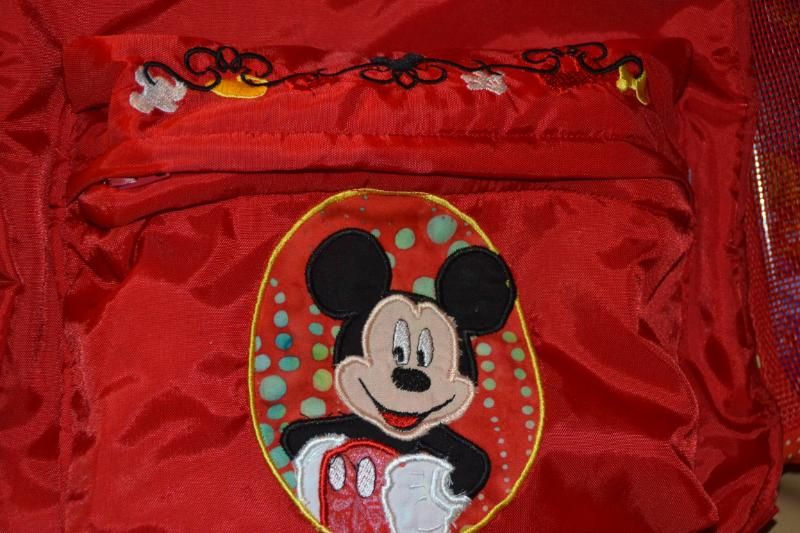
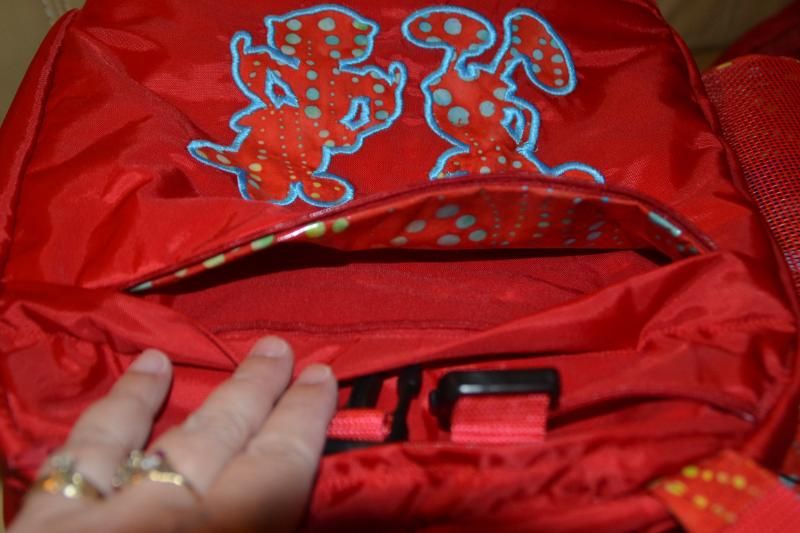
Clik here to view.I went a little nuts decorating this once I had the pieces cut out of both the rip-stop and the laminated batik. I serged the raw edge of the rip-stop and spray-basted it to Ultra Clean N' Tear when hooping the pieces. I put cameo Mickey on the front pocket with a trim design of Mickey icons on the flap. Above where the pocket would be placed, I added the 4 parks, 1 world logo. I used Disney script in a 1 inch size to add our last name and then a 1 inch Tinkerbell silhouette to the handle. On the back flat pocket, I appliqued a Mickey & Minnie silhouette.
Image may be NSFW.
Clik here to view.
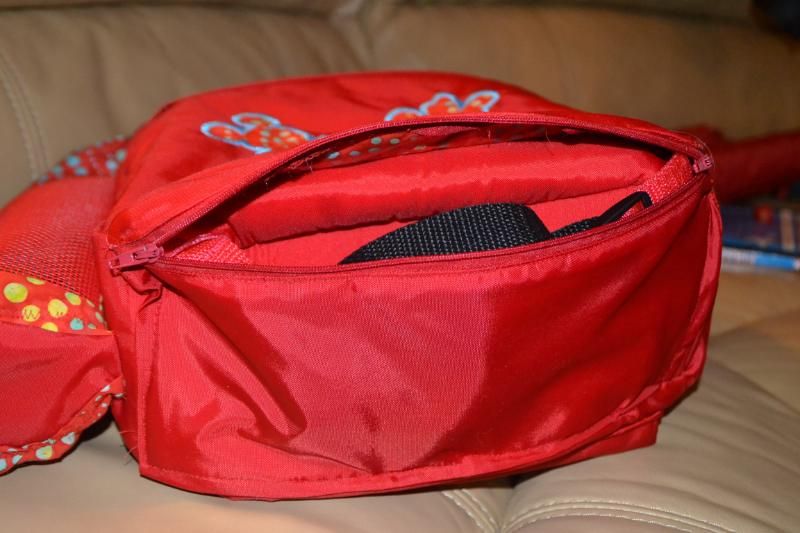
One of the best things to use when attempting a project like this is Make-a-Zipper. You get 5 1/2 yards to zipper with 12 pulls. It is very easy to work with and you can customize your zippers and make them double directional if you want. I did that on the main gusset and the double bottom.
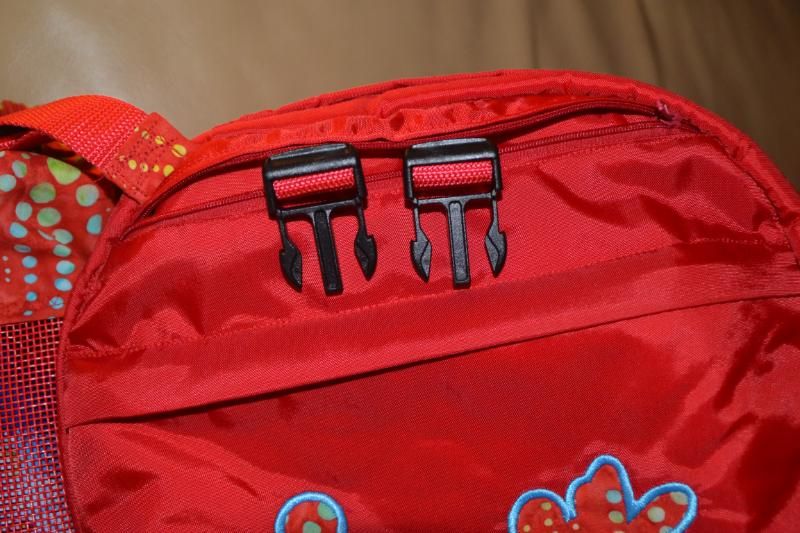
So, why do I have a double bottom on this bag? Well, I wanted strap options and I didn't want to have dangling, unused straps when I converted it to a cross-body bag. The double bottom can hide any strapping not in use. There is a also a small hiding panel at the top of the back to tuck in an unused top clip.
Image may be NSFW.
Clik here to view.Image may be NSFW.
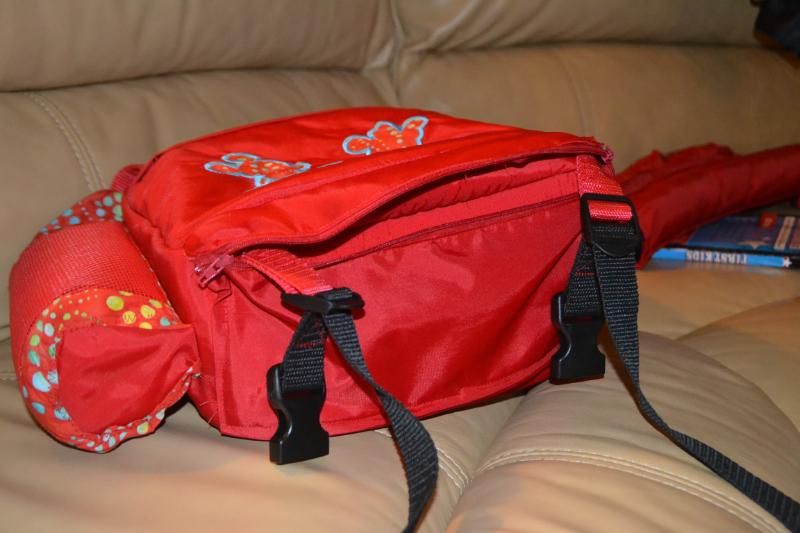
Clik here to view.The straps are clipped on in four places and I chose the directionality for that very carefully. I wanted to be able to convert it, so to make it a cross-body strap (that can be worn front or back), the straps snap together to make one really long strap. Then you tuck the two unused connectors away in their hiding spaces. This way, when it gets hot, I do not have to be all sweaty on my back, I can move that bag.
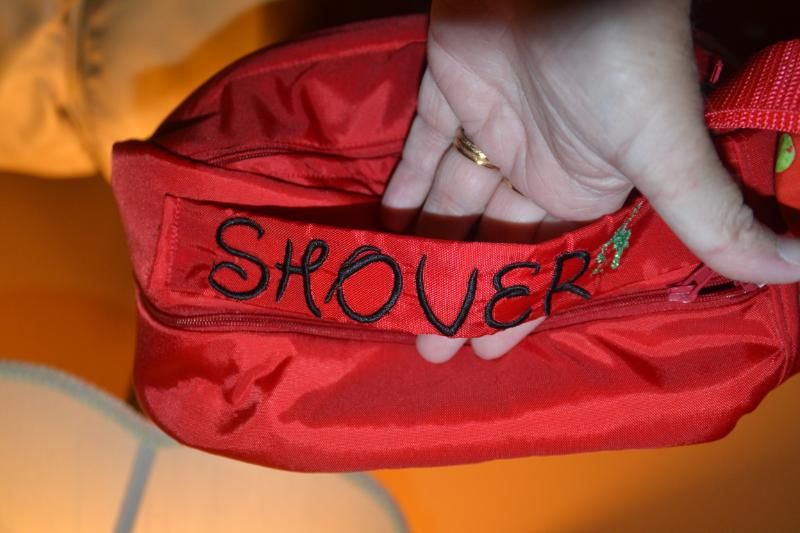
The straps are also pretty well padded. I had thought about buying 1 inch green home dec foam, but I forgot while I was at Joann's on Saturday. I do, however, have a 5 lb box of fiberfill in my garage. So, I stuffed the straps. I think it will flattened down a bit with use, but fluffy is comfy. On one of the straps I put a zippered (and water-proofed) pocket to hold my smart phone. I added a little Mickey embroidery with some rainbow thread just for fun.
Image may be NSFW.
Clik here to view.![]()
Image may be NSFW.
Clik here to view.![]() The water bottle holder was almost an afterthought in terms of execution. I was already partially through making the bag when I added this. I used a piece of red plastic mesh canvas and added a round bottom and a cotton batik bag-like finish to the top. I sewed it on to the side gusset during construction. I could have finished it off with a drawstring, but 1/4" elastic works just fine.
The water bottle holder was almost an afterthought in terms of execution. I was already partially through making the bag when I added this. I used a piece of red plastic mesh canvas and added a round bottom and a cotton batik bag-like finish to the top. I sewed it on to the side gusset during construction. I could have finished it off with a drawstring, but 1/4" elastic works just fine.
Image may be NSFW.
Clik here to view.![]() In order to it the water bottle on the side, I shifted the gusset so the zipper opening is more to the opposite side. I should also note that while most of the back is interfaced with fusible fleece, there is peltex on the bottom as well as up the center of the back piece to give it more shape.
In order to it the water bottle on the side, I shifted the gusset so the zipper opening is more to the opposite side. I should also note that while most of the back is interfaced with fusible fleece, there is peltex on the bottom as well as up the center of the back piece to give it more shape.
On the back between the strap-hiding pockets, there is a flat pocket where I can stash park maps for quick reference. I plan to make a coordinating small wallet to use with this bag as well as a pouch for my camera.
Image may be NSFW.
Clik here to view.![]()
Image may be NSFW.
Clik here to view.

Image may be NSFW.
Clik here to view.
 I do, however, plan to carry a few things and this is where I started designing my bag. I needed it to hold a small wallet, a car key, sunscreen, lip gloss, a tiny first aid kit, my DSLR (a Nikon D3100), cell phone, extra batteries, a water bottle, a small amount of snacks, park maps, ponchos (the cheap kind that they sell for way too much in Disney, but are cheap in Target or Walmart), and possibly a small souvenir or two.
I needed it to have a few separate pockets, but also to be very water-resistant. I wanted soft, comfortable straps, and preferably ones I could adjust and convert to a cross-body type bag.
Here is what I came up with:
The outside is nylon rip-stop from Joann's in a pretty Mickey Mouse red. I drafted the basic back and front panels slightly larger than my backpack purse, but with a much wider gusset to accommodate the size of my camera. All of the lining is a red batik that I fused with a laminating material everywhere it needed protecting (the entire inside as well as pocket linings). I added a dimensional pocket on the front based on directions from a Taylor Made Designs backpack pattern/leaflet, but I changed the dimensions to match what I needed.
Image may be NSFW.
Clik here to view.
 I wanted the water bottle to be able to be easily accessible and not where it could leak on my camera. I toyed around with interior sections, but I decided instead to add a mainly mesh pouch to the side. As I was constructing it, I used a small leftover piece of red webbing to attach a plastic swivel hook. This way, the bottle cap is much less likely to get lost. (On a side note, how cute is this bottle? I got it on clearance at the Disney Store outlet in Concord, NC. It is a 25th anniversary edition and the last one they had.)
I also figured the strap would keep the bottle from falling out even though that is pretty unlikely. Inside the bag, the same strap is attached to a metal swivel hook that would be perfect for hanging my car key securely. We won't be using our car much while there (we are staying on-property at the new Art of Animation Resort!), but I plan to keep the key on that hook so I can easily find it when we do need it.
Image may be NSFW.
Clik here to view.
 I went a little nuts decorating this once I had the pieces cut out of both the rip-stop and the laminated batik. I serged the raw edge of the rip-stop and spray-basted it to Ultra Clean N' Tear when hooping the pieces. I put cameo Mickey on the front pocket with a trim design of Mickey icons on the flap. Above where the pocket would be placed, I added the 4 parks, 1 world logo. I used Disney script in a 1 inch size to add our last name and then a 1 inch Tinkerbell silhouette to the handle. On the back flat pocket, I appliqued a Mickey & Minnie silhouette.
Image may be NSFW.
Clik here to view.
One of the best things to use when attempting a project like this is Make-a-Zipper. You get 5 1/2 yards to zipper with 12 pulls. It is very easy to work with and you can customize your zippers and make them double directional if you want. I did that on the main gusset and the double bottom.
So, why do I have a double bottom on this bag? Well, I wanted strap options and I didn't want to have dangling, unused straps when I converted it to a cross-body bag. The double bottom can hide any strapping not in use. There is a also a small hiding panel at the top of the back to tuck in an unused top clip.
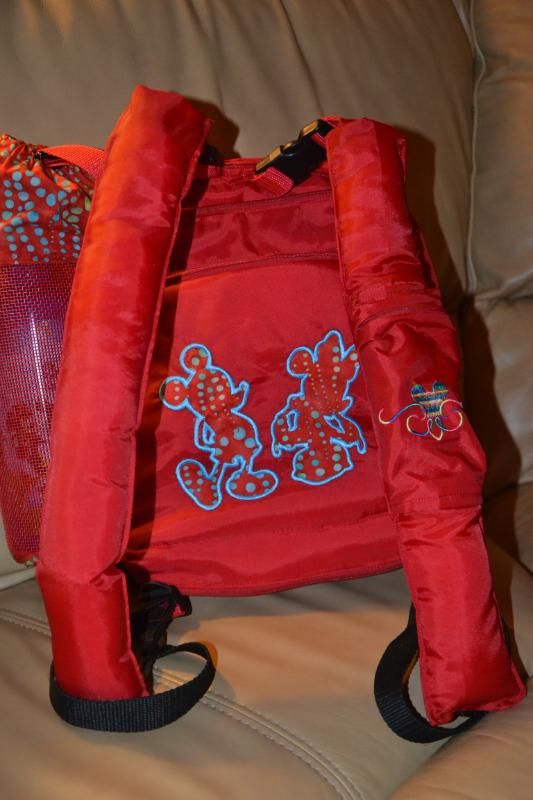
Image may be NSFW.
Clik here to view.
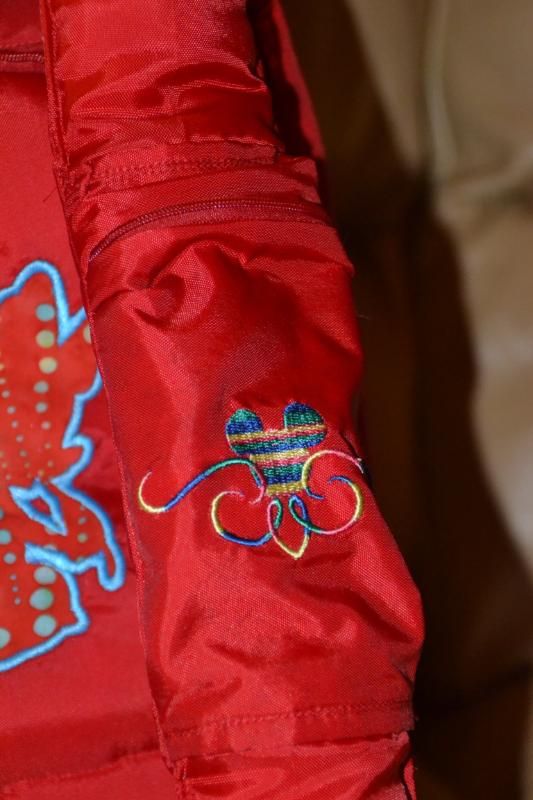 Image may be NSFW.
Clik here to view.
 The straps are clipped on in four places and I chose the directionality for that very carefully. I wanted to be able to convert it, so to make it a cross-body strap (that can be worn front or back), the straps snap together to make one really long strap. Then you tuck the two unused connectors away in their hiding spaces. This way, when it gets hot, I do not have to be all sweaty on my back, I can move that bag.
The straps are also pretty well padded. I had thought about buying 1 inch green home dec foam, but I forgot while I was at Joann's on Saturday. I do, however, have a 5 lb box of fiberfill in my garage. So, I stuffed the straps. I think it will flattened down a bit with use, but fluffy is comfy. On one of the straps I put a zippered (and water-proofed) pocket to hold my smart phone. I added a little Mickey embroidery with some rainbow thread just for fun.
Image may be NSFW.
Clik here to view.
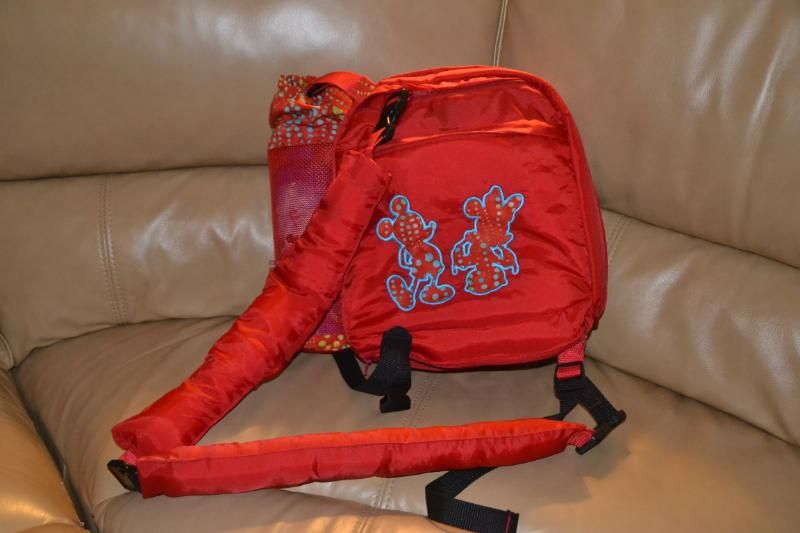
Image may be NSFW.


Clik here to view.
 The water bottle holder was almost an afterthought in terms of execution. I was already partially through making the bag when I added this. I used a piece of red plastic mesh canvas and added a round bottom and a cotton batik bag-like finish to the top. I sewed it on to the side gusset during construction. I could have finished it off with a drawstring, but 1/4" elastic works just fine.
Image may be NSFW.
Clik here to view.
 In order to it the water bottle on the side, I shifted the gusset so the zipper opening is more to the opposite side. I should also note that while most of the back is interfaced with fusible fleece, there is peltex on the bottom as well as up the center of the back piece to give it more shape.
On the back between the strap-hiding pockets, there is a flat pocket where I can stash park maps for quick reference. I plan to make a coordinating small wallet to use with this bag as well as a pouch for my camera.
Image may be NSFW.

Clik here to view.
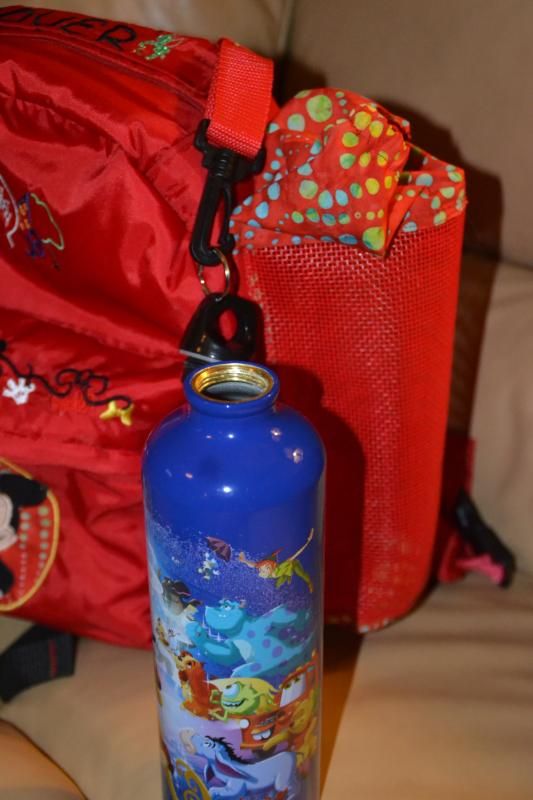
Image may be NSFW.
Clik here to view.![]()
Clik here to view.
